
We explained how to train and publish the Form processing AI Model in another blog. This blog will go through how to use the AI model in a real-world situation.
We explained how to train and publish the Form processing AI Model in another blog. This blog will go through how to use the AI model in a real-world situation.
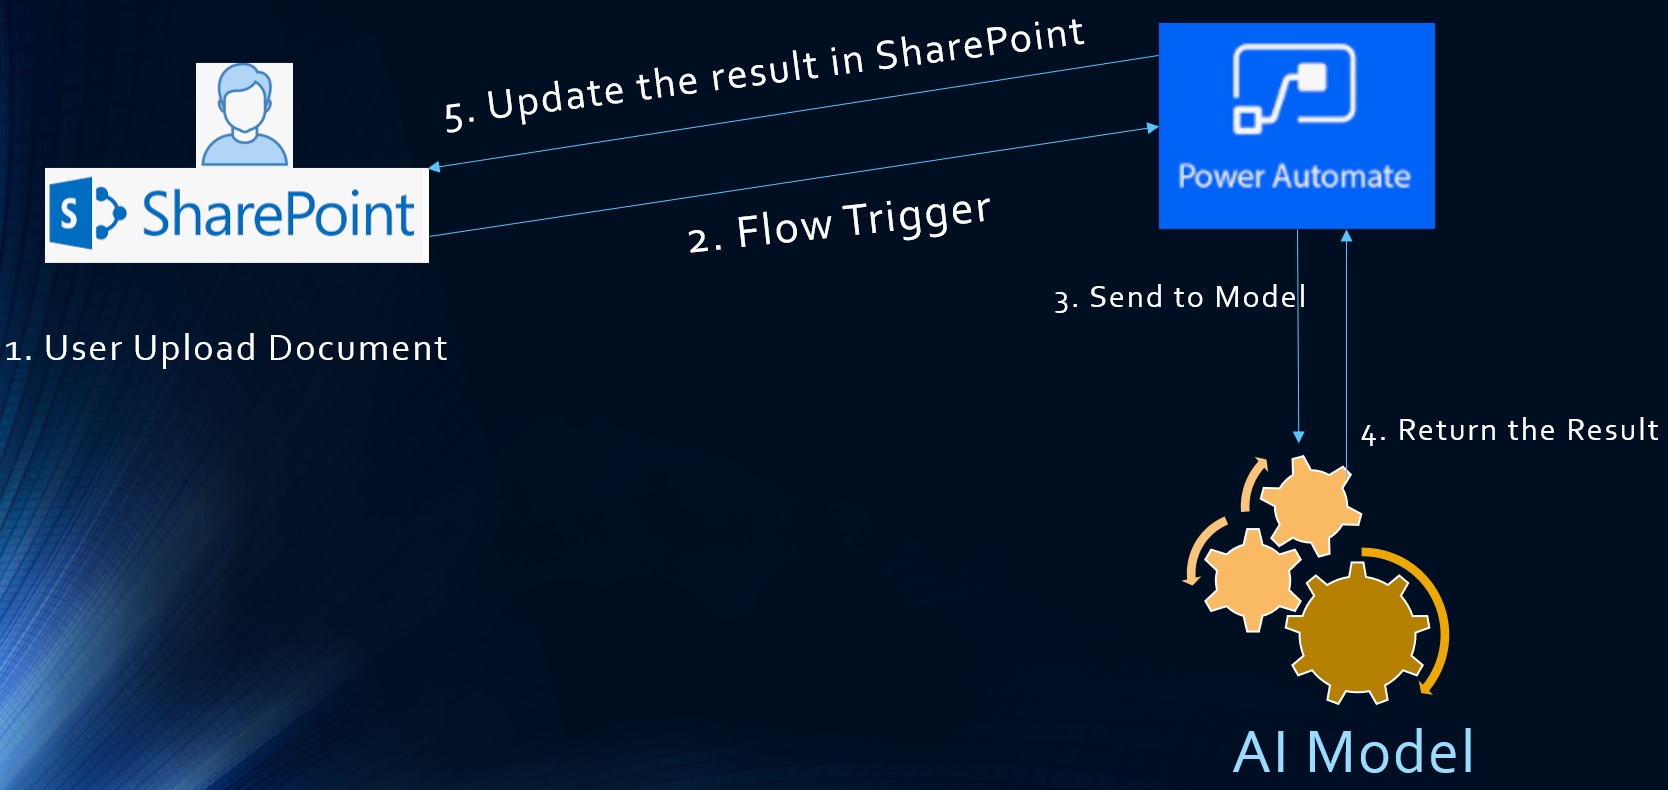
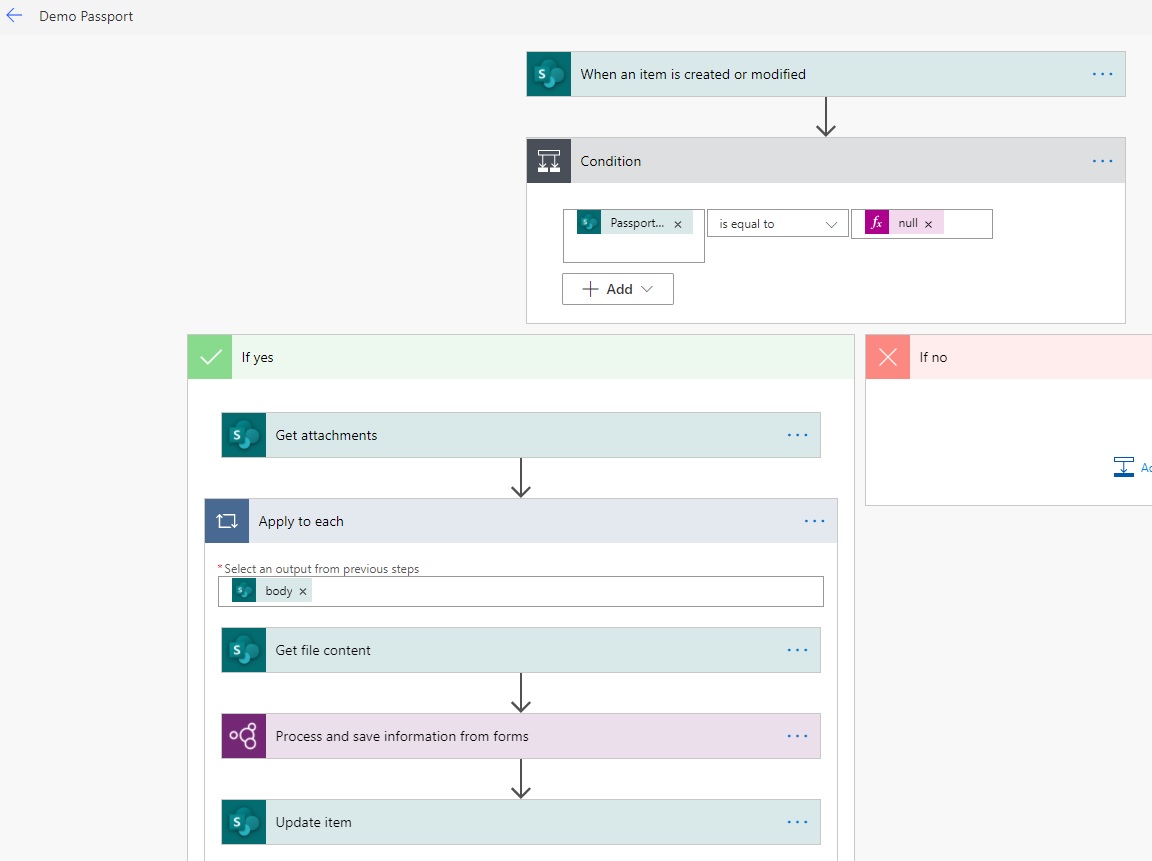
We’ll submit the input from SharePoint in our demonstration.
- The user must first upload the content to SharePoint as the first step.
- The Power automate flow will be activated next.
- The next step is to deliver the data or file content to the AI Model via Power automation.
- The result/output is returned by the Next AI model.
- Finally, Power automates the modification of the result in the SharePoint List, allowing us to double-check the data.
How to use Power Automate to consume AI models step by step
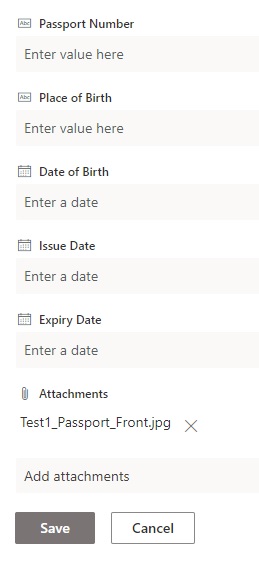
- Make a SharePoint list with the fields listed below. These are the objects/data elements that the form will gather.
- Passport Number – String
- Date of Birth – Date and Time (Date Only)
- Place of Birth – String
- Issue Date – Date and Time (Date Only)
- Expiry Date – Date and Time (Date Only)
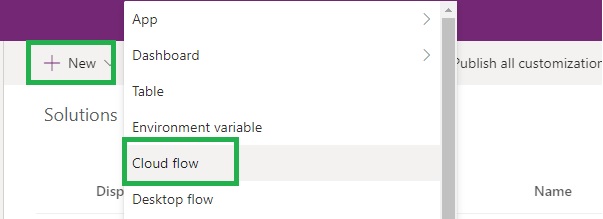
- Create a cloud flow that is automated.
- Go to https://make.powerapps.com to get started.
- Choose a suitable setting.
- Make a new solution (If not exist already)
Note: There are several limitations in the default setting.

- To build a Cloud Flow, go to File > New > Cloud Flow.
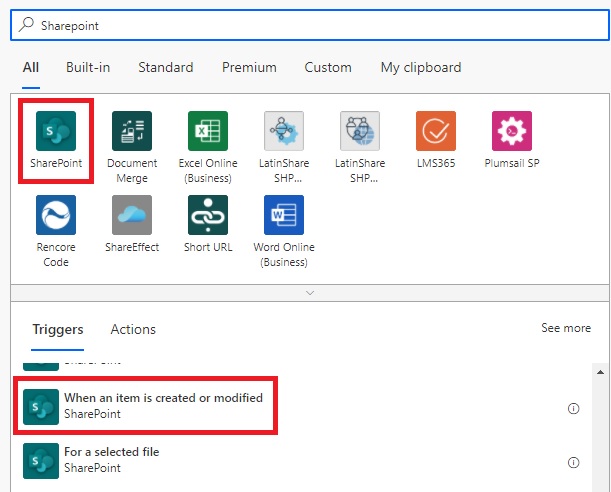
- Source: SharePoint
- Trigger: When an item is created or modified
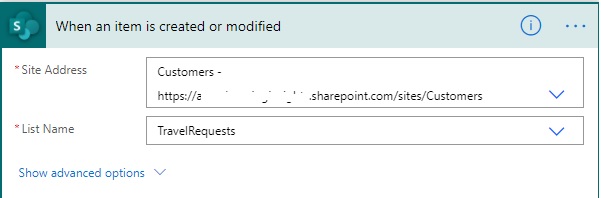
- Fill in the flow’s name.
- Choose your SharePoint site and list.
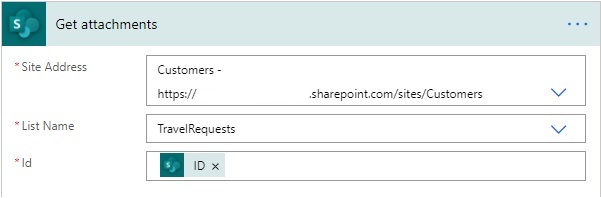
- To get SharePoint Attachments, add a new action.
- Select the same Site and list.
- The id from the Trigger step should be used.
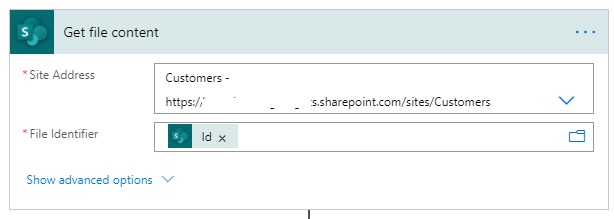
- Add a SharePoint File Content action
- Choose the same location.
- The ‘Id’ from the “Get attachments” step should be used as the File Identifier.
- Send the contents of the file to AI Model.
- Choose the AI model that we designed.
- Choose a form type (this may be done dynamically to determine the file type/extension)

- Add the results to a SharePoint list item.
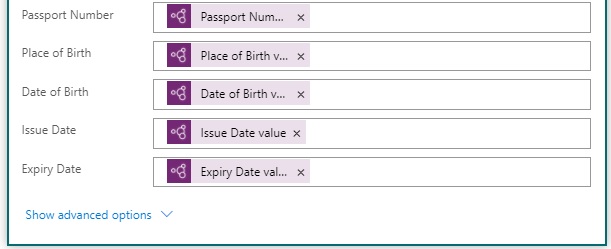
- From the Model findings, we gathered the following 5 fields.
- Full view of the cloud flow
- In SharePoint, create a new list item.
- Include a file attachment (Test Passport)
- Save the list to your computer.
Flow should be activated at any time.
- Check the results in the SharePoint list.


